
This page was last updated on $Date: 2003/07/23 01:18:58 $.
This is not a how-to-do-it article but rather just some photos taken during a major rust repair on a BJ7. The work was all done by me, a hobbiest, in an unheated garage but with a fairly good set of tools.
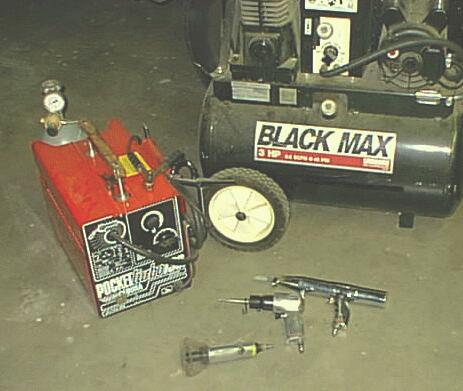 Types of tools needed - air compressor with various pneumatic tools
(e.g. reciprocating saw, chisel, grinder)
Types of tools needed - air compressor with various pneumatic tools
(e.g. reciprocating saw, chisel, grinder)
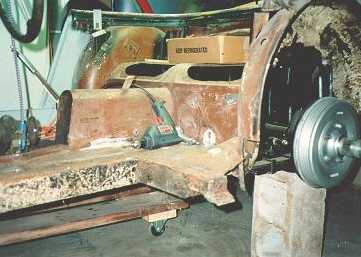
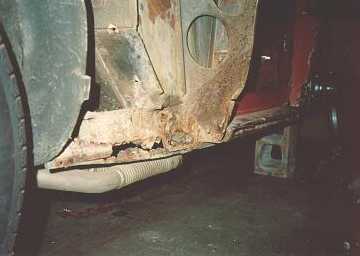 Typical Healey rot. The left front fender has been removed uncovering
severe rot in the sill. This would be hard to see with the fender in place.
Typical Healey rot. The left front fender has been removed uncovering
severe rot in the sill. This would be hard to see with the fender in place.
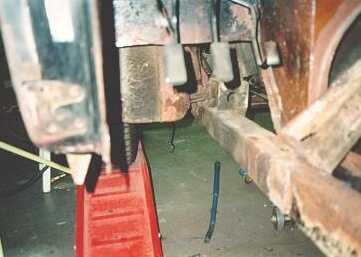
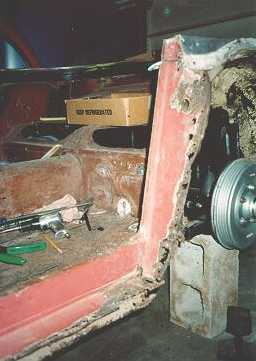 More typical rot. The door shut pillar is rotted away at the outer edge as is
the rocker panel. If the car is elevated off of the floor, it should be
supported only where the wheels would normally support it (I know, I know
I shouldn't have used a concrete block) and the drive train left in so
that the car doesn't twist or deform when major chunks of the body are
cut away.
More typical rot. The door shut pillar is rotted away at the outer edge as is
the rocker panel. If the car is elevated off of the floor, it should be
supported only where the wheels would normally support it (I know, I know
I shouldn't have used a concrete block) and the drive train left in so
that the car doesn't twist or deform when major chunks of the body are
cut away.
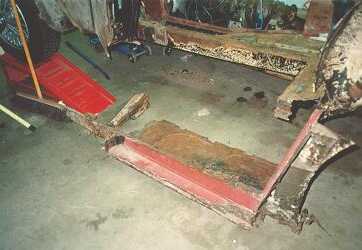 All of the rot cut away. Most of it in one big chunk (floor, rocker panel/sill,
door pillar). The old forward outrigger can be seen as a separate piece.
I used an air powered chisel, hand held grinder and reciprocating saw for
most of the cutting. Front wheels are on a ramp. Exhaust system has been
removed.
All of the rot cut away. Most of it in one big chunk (floor, rocker panel/sill,
door pillar). The old forward outrigger can be seen as a separate piece.
I used an air powered chisel, hand held grinder and reciprocating saw for
most of the cutting. Front wheels are on a ramp. Exhaust system has been
removed.
 In this case, the rear outrigger was OK and left in place. Some of the inner
fender well where the sill was attached was rotted and has been cut away.
In this case, the rear outrigger was OK and left in place. Some of the inner
fender well where the sill was attached was rotted and has been cut away.
 Looking forward. Note that the forward outrigger has been cut off as has most of
the footwell and even the lower end of the door hinge pillar.
Looking forward. Note that the forward outrigger has been cut off as has most of
the footwell and even the lower end of the door hinge pillar.
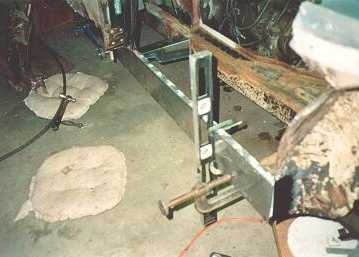 A new forward outrigger has been welded in place and the new sill is being
positioned prior to welding in place. How do you know where to put it? Take
lots of measurements off of the old piece before removing it.
A new forward outrigger has been welded in place and the new sill is being
positioned prior to welding in place. How do you know where to put it? Take
lots of measurements off of the old piece before removing it.
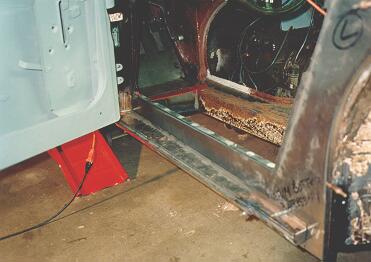 Most of the new stuff is in place except the floor. The sill has been welded
in place but the rocker panel is temporarily held in place with cleco clamps.
Note the door is hung so that the rocker panel can be fit to it prior to
final welding. The door placed in it's proper place is critical as most
of the other pieces are positioned relative to it. I think at the factory
they must have suspended the doors in space some how and built the car
around them.
Most of the new stuff is in place except the floor. The sill has been welded
in place but the rocker panel is temporarily held in place with cleco clamps.
Note the door is hung so that the rocker panel can be fit to it prior to
final welding. The door placed in it's proper place is critical as most
of the other pieces are positioned relative to it. I think at the factory
they must have suspended the doors in space some how and built the car
around them.
 All of the grey primered metal around the door opening as well as the floor
and footwell panels are new (both sides). The boot floor was replaced and
some battery acid damage to the rear aluminum shroud was repaired with
fiber glass. Lots of other body work was done including replacing the lower
lip of the front shroud and splicing fenders and patch panels. One rear
fender consists of four different pieces welded together. One front fender
was made out of the good parts of two crunched fenders.
All of the grey primered metal around the door opening as well as the floor
and footwell panels are new (both sides). The boot floor was replaced and
some battery acid damage to the rear aluminum shroud was repaired with
fiber glass. Lots of other body work was done including replacing the lower
lip of the front shroud and splicing fenders and patch panels. One rear
fender consists of four different pieces welded together. One front fender
was made out of the good parts of two crunched fenders.
All of the body welds were first flanged, then welded and then leaded. Final minor imperfections were fixed with dabs of Bondo.
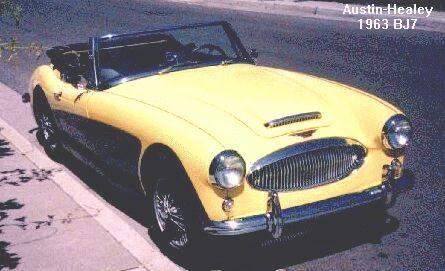 Final result.
If you have any questions, feel free to drop me a line.
Please send comments, additions, and errors for the SOL Healey web pages to Bob Haskell.
[SOL
![]() Web
][
Scions of Lucas
Web
][
Scions of Lucas
![]() Home Page
][
SOL British Car Clubs Page
]
Home Page
][
SOL British Car Clubs Page
]